


Hello,
hello! I'm very excited to be guest posting today for Elizabeth. I've
created a little tutorial for you on how I created this card:

Elizabeth
was
so kind to send me this fabulous Thoughtful Tidings set from Close to
My Heart to work with.
**note from Elizabeth this stamp set was a previous stamp of the month and is no longer available. However, there are many fun stamps you could use from your stash. Need some new stamps? Check out the sale going on this month - buy two stamps and get one free only until the end of June **
It is such a fabulous set and the quality is
outstanding, too! So, here's what you'll need to make this card:

I
used some Fresh Inks in limeade, pool, strawberry, melon and mango, but you can use whatever you have on hand. I have a standard white
card, some post-its, the Thoughtful Tidings set and the Create-a-Plaid stamp set by Clear & Simple Stamps.

The
first step is to mask a strip in the center of your card using the post-its.

Next begins
the fun part, stamping! Just stamp alternating colors using a thin line stamp.
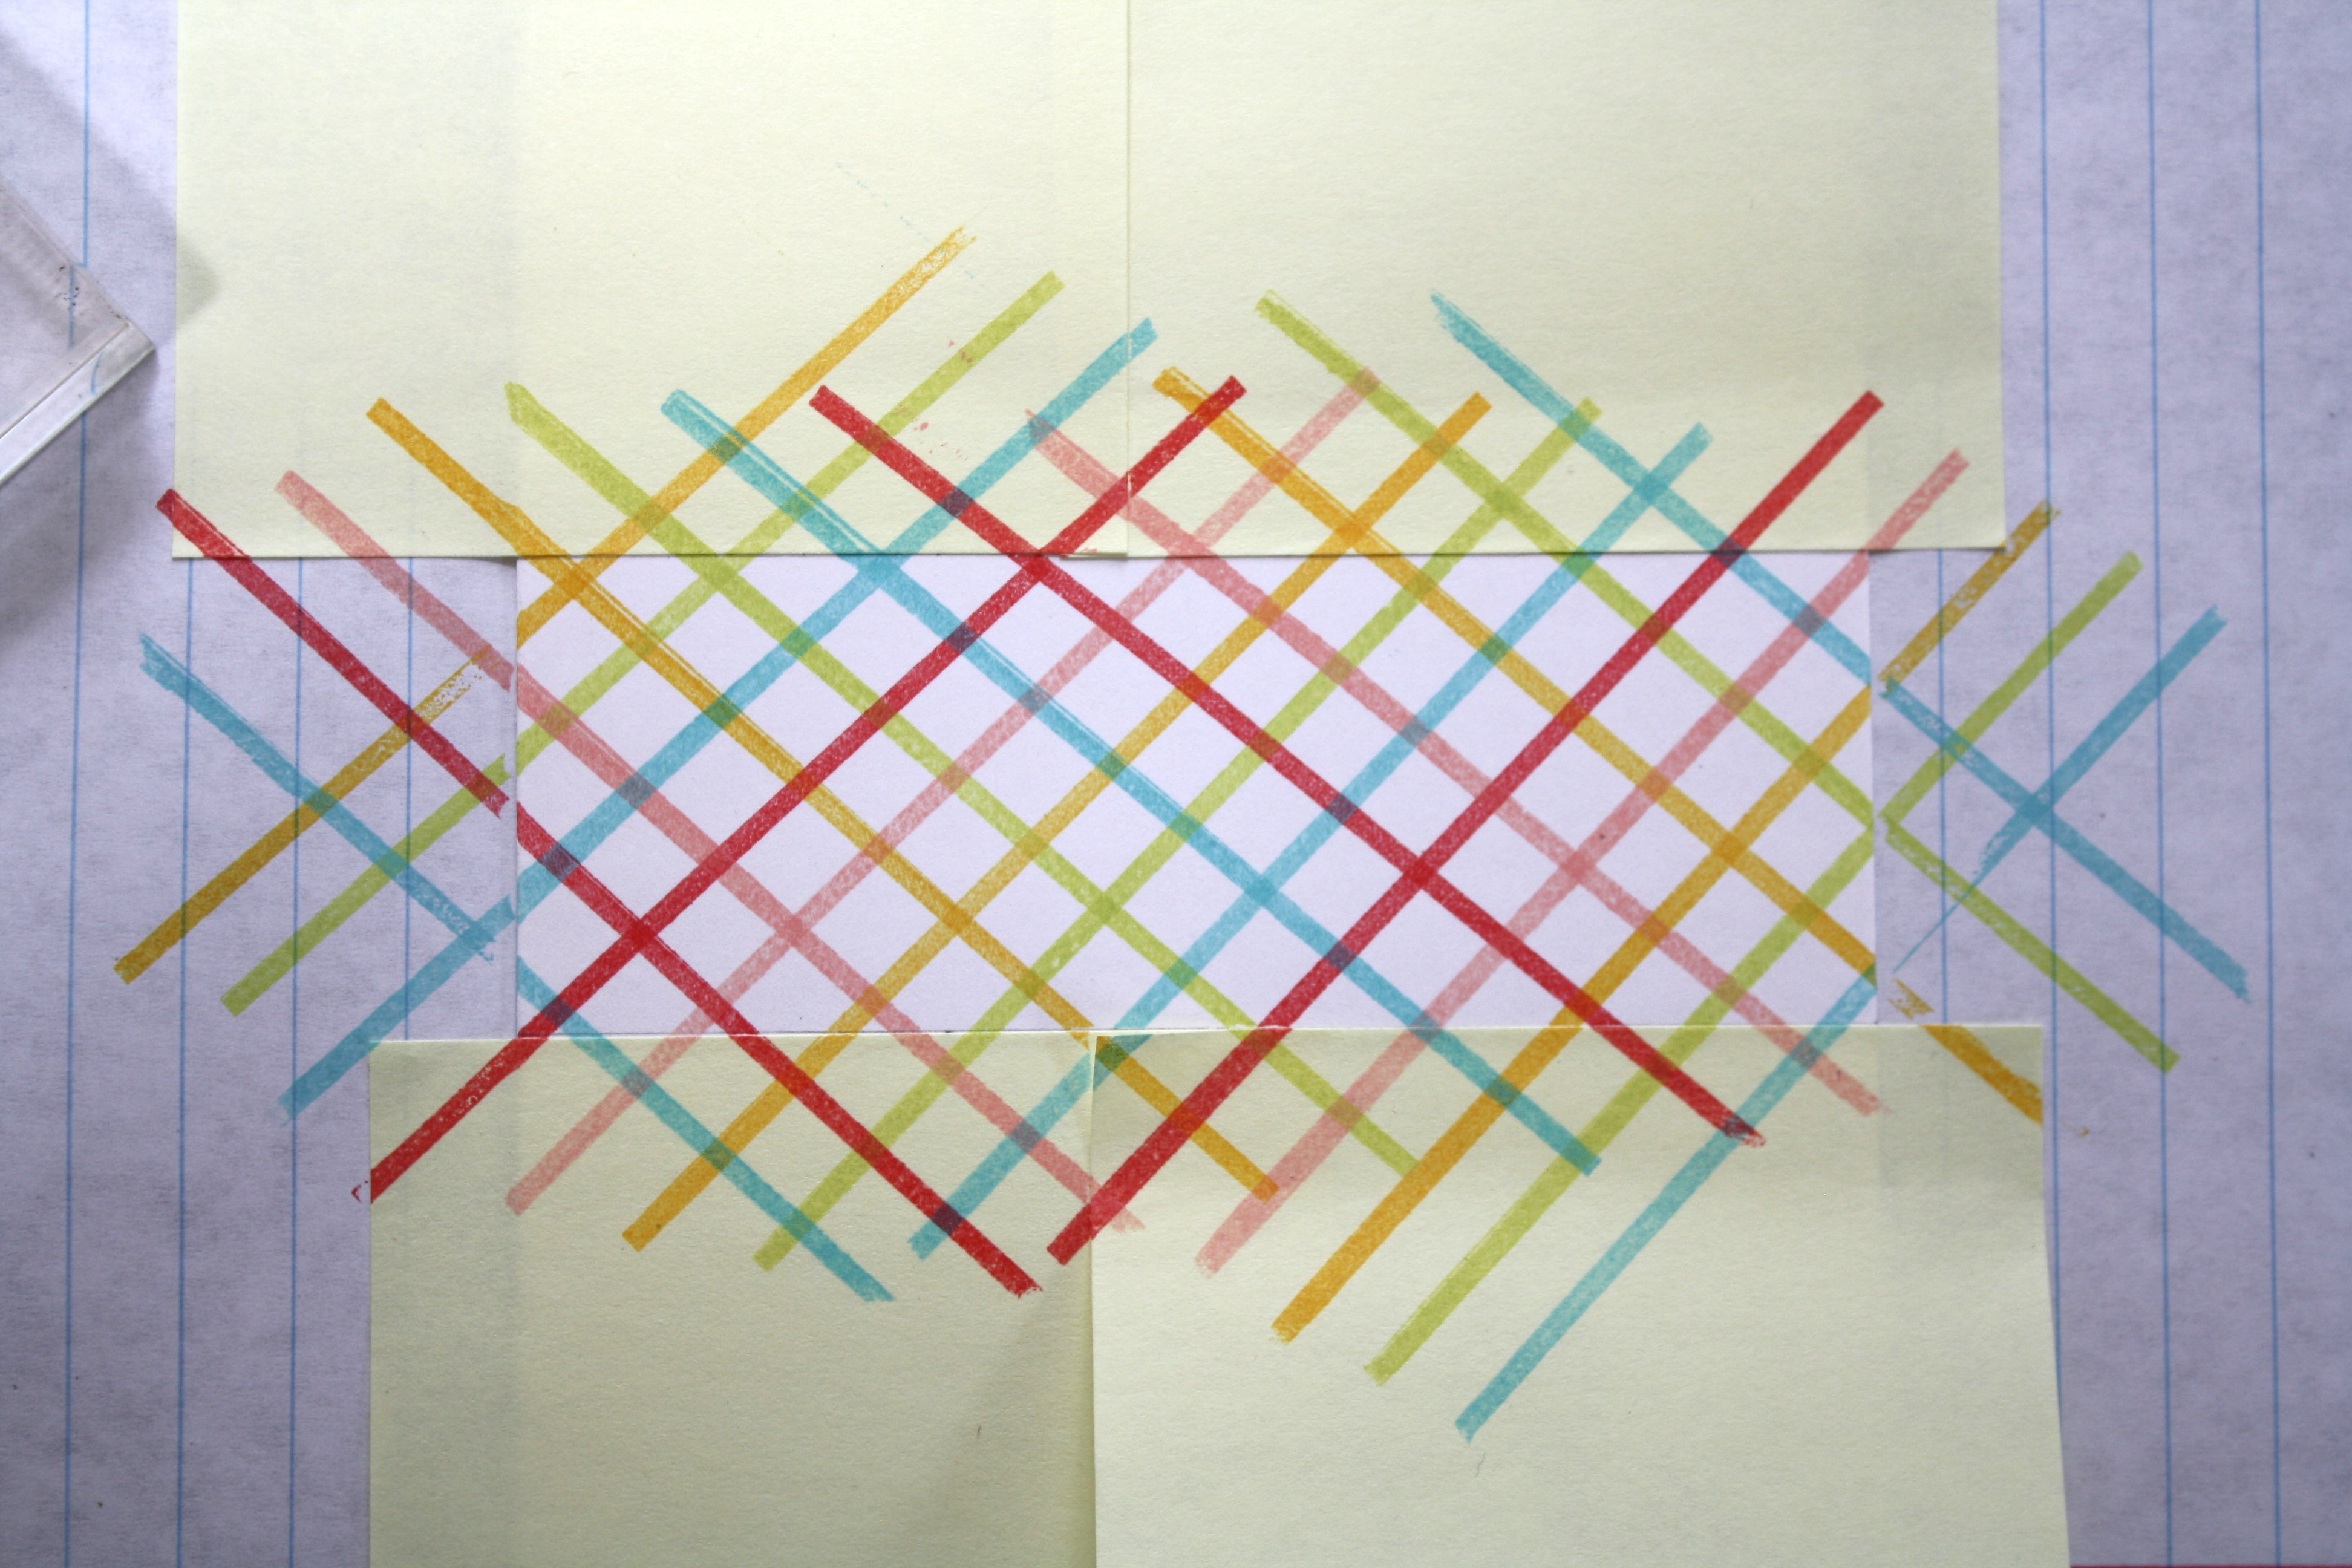
Now stamp
the opposite direction, creating a fun plaid pattern.

Remove your post-its and admire your
colorful plaid creation.

Now
stamp your sentiment on a separate piece of cardstock. Look
at the perfect impression this stamp gives. Then cut your sentiment out
and adhere to your card. Here's another look at the finished product:
I
had so much fun with this card that I wanted to try one more card with the same colors and technique.

I masked
off the top portion of the card front, stamped the plaid pattern and die cut the sentiment opening using the fillable frames #11 die by Papertrey Ink.

I
used another sentiment from that same Thoughtful Tidings set and tied
some white floss with an aqua button. There's endless possibilities with
masking and creating plaid patterns. I hope you will give it a try!
Thanks so much to Elizabeth for the fun stamp
set and fun opportunity to share my little tutorial with you! Hope you
have a great weekend:)
Thank you Laura for such a fabulous tutorial and beautiful cards! I love the colors! If you are interested in guest posting here on Broken Treasures please e-mail me at alwaysdeeper at hotmail dot com - I'm looking for posts in the fall and winter :) Have a great weekend!!


Laura is amazing!!! Love this
ReplyDeleteI could not agree more Wida! Thanks for visiting and taking the time to comment :)
DeleteGorgeous gorgeous cards!!! The masking is absolutely superb! Laura's take on designs always amazes me! This tutorial is no exception!! Love them to bits!
ReplyDeleteI am equally inspired by Laura! Her work is always gorgeous :) I'm so glad she shared her talent with us here :) Thank you for stopping by and taking the time to leave a comment :)
DeleteSo so fabulous!!!
ReplyDeleteReally favulous! Thanks Lalo for stopping by and leaving some love :)
DeleteGreat tutorial, and gorgeous cards by Laura (as always)! I love the instruction "Remove your post-its and admire your colorful plaid creation." LOL! I do this often - admire a piece of the creation along the way. :-)
ReplyDeleteI love to admire my work along the way as well :) Thanks for stopping by and taking the time to leave a comment!
DeleteLaura's tutorial is fabulous! Thanks so much for inviting her to share!
ReplyDeleteYou are welcome Deb! She was super sweet and easy to work with - I indeed have found a new friend in Laura :)
DeleteLove both of them!
ReplyDeleteI'm so glad Janet :) Thanks for stopping by!
DeleteOh wow, I just love all those colors together! Laura always does such an amazing job on her cards. Very striking card! Great tutorial too!
ReplyDeleteThanks for stopping by Kelly and for taking the time to leave some love - these cards really are very striking! Love the colors :)
DeleteWhat gorgeous colours and amazing masking technique, Laura! Thanks for sharing. Love the window diecut and that button is very cute on the second card. Love your work always, Laura!
ReplyDeleteI have try it out tomorrow :)
I'd love to "see" your card if you try it :) You can post a photo over on my facebook page www.facebook.com/brokentreasure - please stop by and post a photo of your card :) Thanks for stopping by here and taking time to leave a comment :)
DeleteI've been a fan of Laura's work for so long. Glad to see she's being featured here. These cards are amazing!
ReplyDeleteI'm a newer fan of Laura's and was super excited to have her guest post! I'd love to feature your beautiful cards as well please e-mail me if you are interested! Thanks for stopping by and leaving a comment :)
Delete