Tuesday, December 10, 2013

Studio J (Close To My Heart) Christmas Cards

I just wanted to share with you how I made our holiday Christmas cards this year using Studio J.  I really loved this idea and think making birthday invitations and personalized wedding, bridal or baby shower events would be just as much fun!


Here is a step by step on how I created our cards.

1.  Go to my website and set up a free account with Studio J. 

2.  Begin a "New Project" I titled mine Christmas Cards you can all yours whatever you want.

3.  You will be prompted to upload your photos.  You can add your family photos now or if you are like me and did not yet have your photo ready just select "upload photos later".  

4.  Select "create your own custom kit"  There are a lot of paper packs to choose from.  I used the Sparkle & Shine holiday pack for my cards.  Select "continue" 

5.  The next option is to select your choice of patterns and you will choose "No Limits"
(by the way this pattern is an excellent way to use any of your previously created pages on any digital program and have them printed out with Studio J.  You just upload your jpg files of your pages and then drop them into the "No Limits" pattern and order your prints.)

6.  Select your Kit Mix (they are all the same so just choose one and select continue)
Your screen will look like the photo below 


7.  Start creating your cards.  I designed 4x6 cards so that can send them as a post card.  You could design them at 4 x 5 1/2 to fit into a standard envelope as well.   I may change my mind and order some 4x6 envelopes as well I haven't decided yet.  For mine I created a 4x6 journal area under Text & Photo Areas.  Then I just copied and pasted to fill the page as shown below.   


8.  Go to "Paper" and select your choice to fill in each journal area.  Select "edit text" and then delete the text and hit the space bar.  Do this on all your journal areas.  In my cards I added a second journal area 
(3.75 x 5.75) filled in with black paper and distressed with white ink to give it a chalkboard look.   


9.  Then add your photo blocks.  I added mine as 3 x 5 photo.  Now I started to create the banner with My Stickease but after I got my photo and put it in they made me look like I had Mickey Ears so I changed it up to just have ornaments and then a plain "no frills card" to make my husband happy.  

10.  This is the easiest way I found to make them all the same.  I selected each area while holding down the Ctrl key on the keyboard.  Then I selected copy and paste from the top of the screen.  Then I used my arrow keys without clicking on the screen to move the card where I wanted it to go.  You can see that in the photo below.  The selected areas are surrounded by a blue line.  


11.  Add your text boxes as journal areas, select none at the bottom of the journal box for the color of your text box and move it around to fit your needs.  I created one for Merry Christmas and one for The Mindemann Family.  


12.  Edit your cards as necessary - add to card - approve your layout and order.  They will ship to your house in about a weeks time.  Then you cut them out and send them on their way!  

Here is one sheet of our cards with the ornaments


The other side I opted for no ornaments. 


Now I realize that it might be a little late for you to create cards (but maybe you are a last minute kind of person) but keep this in mind for next year or for other personalized cards you need to create.  


   Creatively Yours,
Elizabeth

Elizabeth Mindemann alwaysdeeper@hotmail.com www.ejoym.blogspot.com
.
Pin It

Monday, December 9, 2013

Joyful Stars December Blog Hop


   Welcome to the Joyful Stars Blog Hop.  
If you are coming from Cindy's blog you are in the right place!  

Today I created two cards using the same stamp set 
from the Frosted Card Workshop on the go.
The first one is using white ink, prisma glitter, 
and the Sparkle & Shine paper pack.  

I used a bowl to trace the curve on the card and then cut them out - real high tech I know - lol


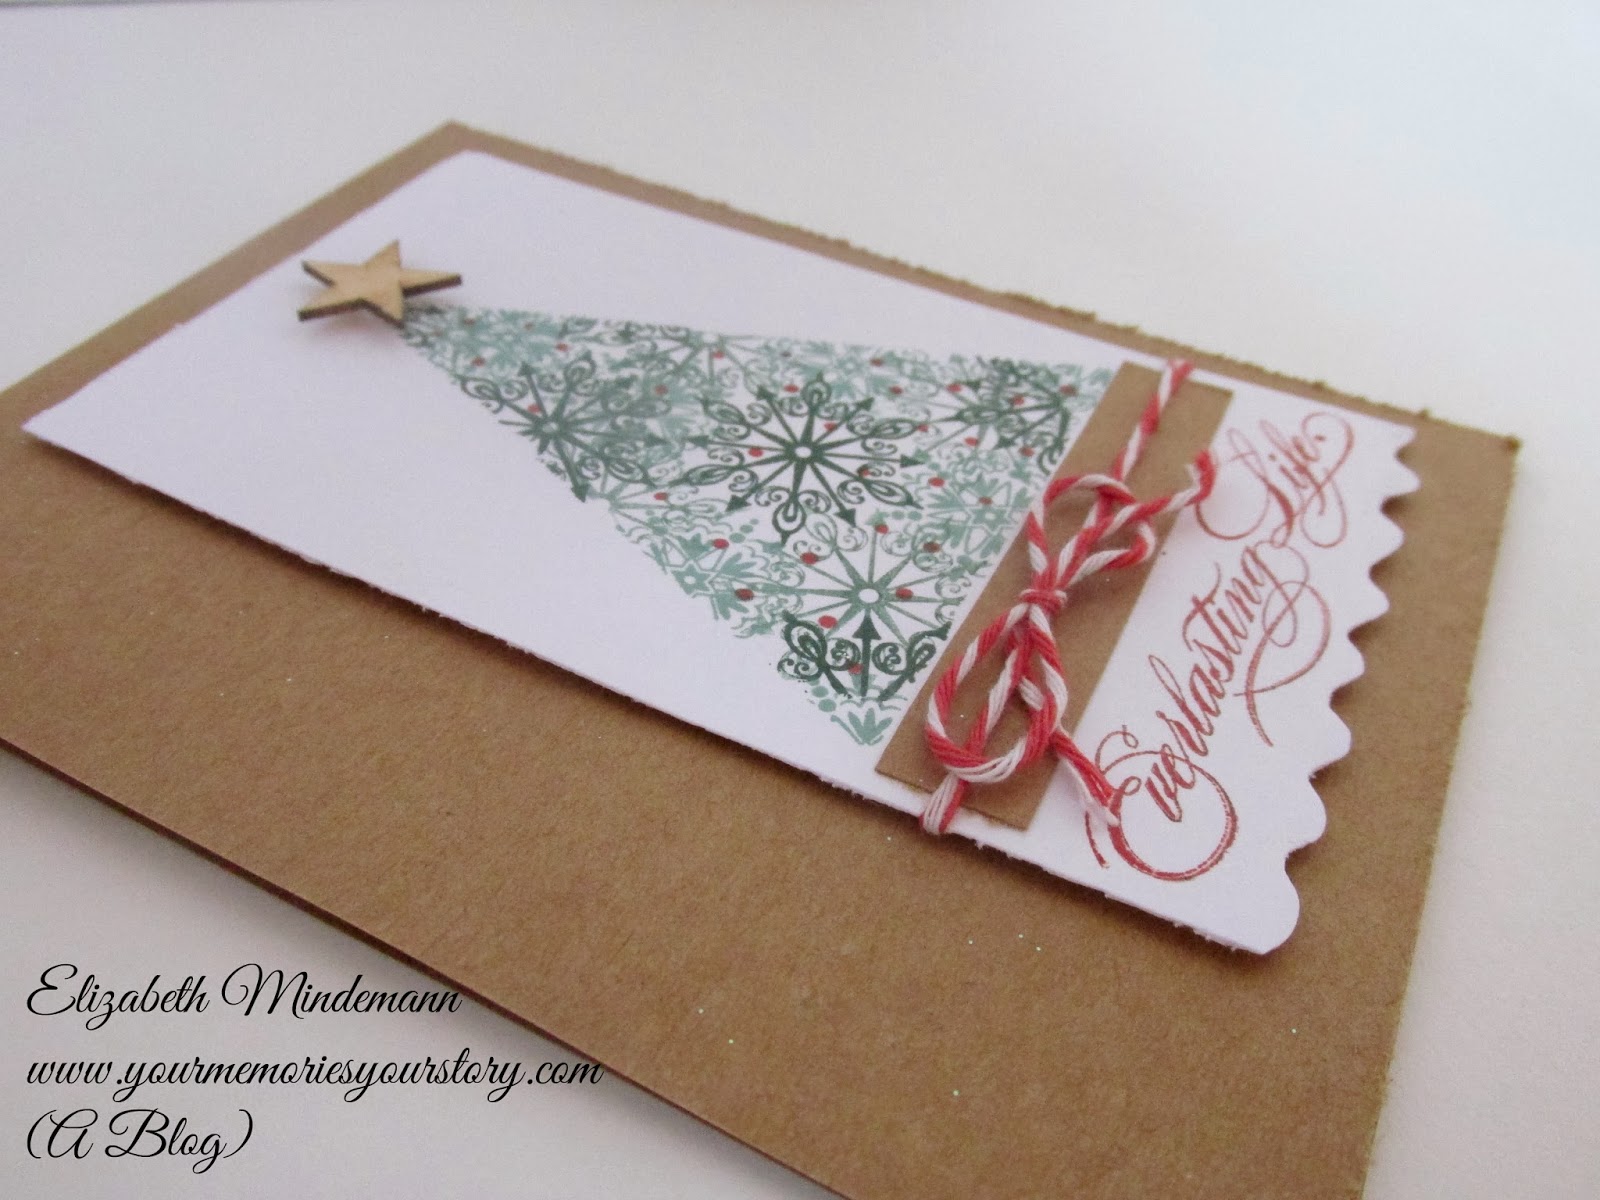
The second card I cut out a triangle from a piece of scrap paper and taped it down over the white cardstock piece.  Then I used juniper and new england ivy inks to stamp the snowflakes inside the triangle creating a "tree".  The star at the top is a wooden shape from the color ready trinkets shapes and the Everlasting Life sentiment is from the a retired stamp set.


Thanks for stopping by now hop on over to Nancy's blog and see what she created for you :) 

You can view the full list at Joyce's blog.  

Happy Hopping!  
Elizabeth

Elizabeth Mindemann alwaysdeeper@hotmail.com www.ejoym.blogspot.com
.
Pin It

Saturday, December 7, 2013

Let It Snow Blog Hop

**Crafty Chicks Blog Hop post if you are looking for it***

Welcome to the Let It Snow Blog Hop!  You should have arrived from Carolyn's blog and this is the last stop on our hop.  You can go to Lisa's blog to start at the beginning :)

Our theme is snow and I created a snowy decoration for my home.  I used my Artbooking Cricut cartridge to cut out the Merry & Bright from glitter paper and a piece of the striped paper from my Sparkle & Shine paper pack.


The snowflakes were also cut with the same cartridge and strung with some cranberry baker's twine.  The frame was from the Dollar store and the sentiment was pasted onto a piece of Ruby red cardstock.


I hope you enjoyed the hop and have a very merry & bright holiday!  I'm giving away a sparkling prize package of Close To My Heart goodies for this hop.  Just visit my website and then come back and tell me your favorite item from the Holiday Gift Guide (I will pick a winner from the comments and announce here and on my facebook page next week December 14th)

Happy Crafting!
Here is the full hop list:
2. Julie (Cricut Chick)  ~ www.simplysilhouette.com
  
Elizabeth

.

Friday, December 6, 2013

Crafty Chicks December Blog Hop


Welcome to the Crafty Chicks Sparkling Season December Blog Hop!  

We are so excited to have you hopping along with us this month!  This month it is all about the sparkle & the shine :)  My kids and I created these super simple paper trees using the Close To My Heart Sparkle & Shine paper pack and green glitter paper
 

First I used the Artbooking Cartridge on my Cricut to cut a 6", 5", 4", 3" and 2" circle out of each pattern paper.  Then we folded each circle in half, in half again, in half again and in half one more time.  Then we cut a small hole in the tip of the triangle we created in each circle.  We put a wooden dowel through the center of each one and attached a small wooden circle from the Wooden Badge Buttons on sale in while supplies last. 
 
This was a lot of fun and super simple to create.  We are keeping decorations simple this year because we purchased a house and are moving the first week of January.  
It's a little hard to decorate when my husband wants to pack everything up - lol
The favorite of everyone was the green glitter tree.  These are so simple - I mean really simple - my seven year old, six year old and three year old make them with a little help from me.  I made the Glitter one :)
 

Our sponsor this month is me!  
Elizabeth Mindemann, Director with Close To My Heart and you have a chance to win a $25 gift certificate to my website www.yourmemoriesyourstory.ctmh.com  This will be the perfect gift for the creative person on your list or use it for yourself to get some yummy crafting goodies.  You have one week to enter, create and share projects and participate in any of the other optional entries.  
 
Just fill out the Raffle Copter form below and have fun hopping!  Please leave a comment here on my blog telling me what your favorite item is from the Holiday Gift Guide.  Then leave some love on all the other blogs on the hop.  In order to get some extra entries you can create a sparkling project of your own and post the photo our facebook page.  
Thanks for hopping along!  Your next stop is Krysthle!
The complete list is here: 

Elizabeth

Elizabeth Mindemann alwaysdeeper@hotmail.com www.ejoym.blogspot.com
.
Pin It
Related Posts Plugin for WordPress, Blogger...