Thursday, June 30, 2011

No one is perfect

I feel the need to let you all in on a little secret.  I have to share what happens most of the time when I'm crafting with my children lest anyone think I am such a good mom to include my kids in what I love to do.  I don't want you to get the wrong idea that we always have fun together, never argue or fight, and always stay super clean!  This is not the truth.  The truth is that after almost every session someone needs a bath (most of the time it is me!) and there are often tears.  I am a perfectionist and struggle with letting my children do their own thing.  But I am learning.  God is changing me as I am teaching my kids.

Yesterday's craft session found my littlest one under our table.  After a few minutes of quietness I investigated and found this.


  Yes, at first I was quite frustrated!  This was an interruption to my day, not something I had planned.  Then I realized that SHE is my day.  Her and her brothers are my plans.  God has given them to me this day to enjoy, raise, teach, play with and even clean.  After her bath in the kitchen sink, we sat together on the floor in the kitchen.  I used some of the stamp cleaner on her hands and she giggled.  We laughed together, she walked around the room a little and then came back to me for more "cleaning" and another hug.  I did wash off my ink cases (they were covered in smoothie ink).  And yes, I was a little more than upset that she chose that color to dye her skin with - another color might have washed off easier.  Oh well.  Tomorrow is another day.  Today I'll just enjoy my kids.   

Wednesday, June 29, 2011

Celebrate!

This week's Just Us Girls and Heart 2 Heart challenges both had to do with July 4th.  The challenge for Just Us Girls was a 3D 4th of July project.  I do love celebrating just about anything but was struggling to come up with something to make that I would use - and let the kids help me in the process.  So I did a search and found some really neat paper decorations to help celebrate our Nation's Birth and still fit into my country/rustic/antique preferences.  Country Living had a great selection to choose from.  I adapted the banner slightly using Barn Red, Pacifica Blue, and Bamboo papers instead of crepe paper (for the Heart 2 Heart challenge) and some Colonial White and Cranberry just because.  I also made the size smaller using 4" by 10" strips of paper instead of 8" by 20".


So get out some red, white and blue paper and left over newspapers.  Cut your paper.  You need one 4"x10", one 1"x10" and one strip of newspaper 2" by 10" for each rosette.  For "CELEBRATE" I did nine rosettes.  Figure out what you want to say and make however many you need.  I also want to make one that says FREEDOM but haven't gotten to that yet.  Anywho, glue your newsprint to the wider colored paper and then glue the thinner colored paper on top of the newsprint.  Allow your papers to dry.  I also used 
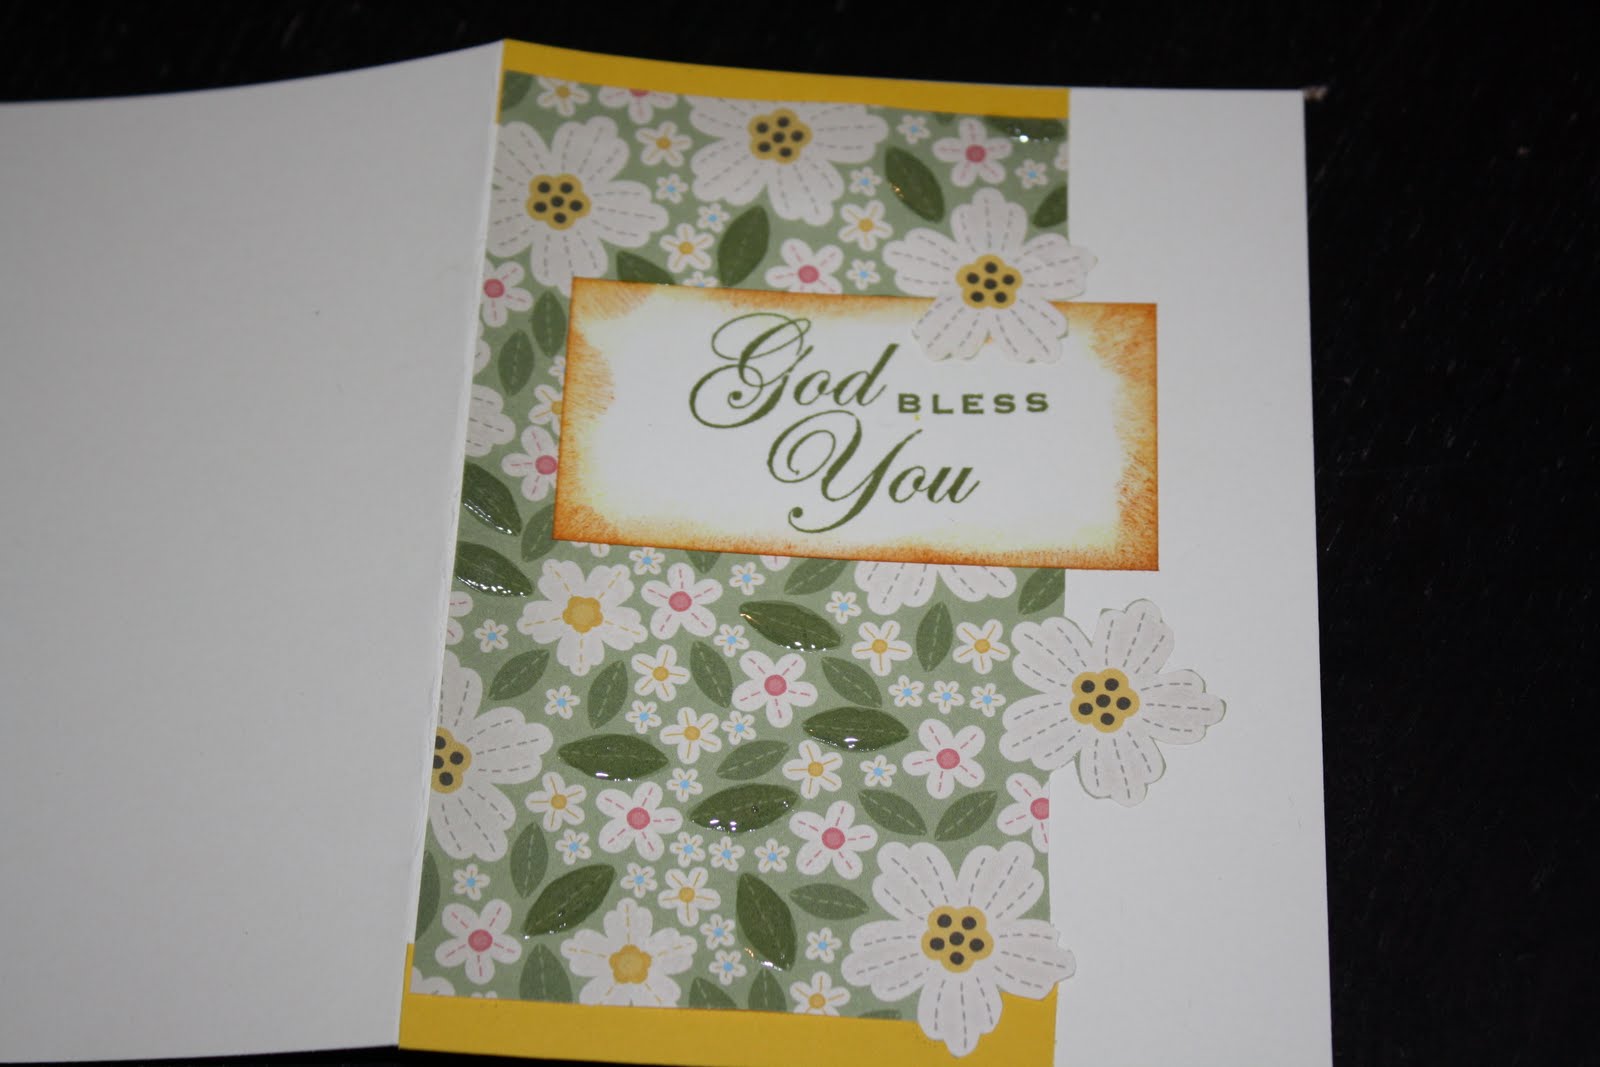
CTMH white daisy ink, Enjoy Life stamp set and Eclectic Edges stamp set to stamp onto the wider strips of colored paper.  I chose not to do it on all the paper but only on a few just to give it some variety.  I was really pleased with how it turned out.
  Then fold the paper in half length wise and unfold.  Next, acordian fold your paper starting at the narrower end and secure with string (I used a twist tie) in the center.  Fan out the paper and glue to make a circle.


String the rosettes together however you choose (I cut slits in the rosettes and threaded the twine through).  Have fun and CELEBRATE our FREEDOM!


I just discovered Today's Creative Blog and 1. Fell in LOVE with it and 2. Think this qualifies for the Craft Link Party.  I love all the new creative blogs, ideas and inspiration I am finding! 

Tuesday, June 28, 2011

Trees

I am in love with the outdoors.  To just sit outside under a tree and read is one of my favorite things to do.  Can't say I have done that in a long time . . .

So instead I sit inside with my kids and make paper "trees and things" 

Check out this video on some awesome techniques you can use with clear acrylic stamps.  This is one of the many reasons I love Close To My Heart and the wide variety of clear stamps.


If you like what you see here and want to try this technique out for yourself get the Trees & Things Stamp Set.  I'd love to see your creations.
 

Monday, June 27, 2011

Home

Good morning!  We are home from our trip to Chattanooga and we are changed because of it.  Thank you for your prayers.  I am happy to report that all of our children are doing fine and we survived the week unharmed.  God is so good!  Please continue to keep the children in Chattanooga in your prayers as well as Hope for the Inner City.


I hope to try some new projects and post on here soon this week but it may be a few days as I have a lot to do to recover from being away.  Sometimes I think the piles of laundry, cleaning and meal preparations will never go away . . . that is probably because they won't on this side of heaven.  Thanks again for your prayers!   

Friday, June 24, 2011

Paper Beads

This is AWESOME!  I am super excited about how I used the Liquid Glass to make paper beads.  Yes, paper beads!  I found this tutorial on paper beads.    

Now I rolled the paper to make the beads and used the LG to adhere the beads.  Then I painted LG all over the bead to keep make it hard.  You then roll the beads in VersaMark ink and set them with a heat gun.  So much fun and I love the way they look!


I really am excited about these.  I think next week I am going to try to make my own bag instead of cutting out the template with the cricuit and then using paper beads for the handles.  I don't have the ink and heat gun that I need yet to make them even more durable like plastic beads.  Once I get those items I'm excited to make some more beads.  These are so pretty, you can make them in whatever color paper you have on hand, you can even use magazines or newspaper and then leave them "as is" or paint them.  So many options and all of them are "green" because you are reusing paper!  Yay!

I made all these projects in a total time of 2 hours and only used four of the 24 ways (plus more I'm sure) that you can use Liquid Glass.  Pick up a bottle for yourself and have fun playing.  I'd love to see what you do with it, post some photos here or link to your blog. 

Thursday, June 23, 2011

Rain Drops on Roses

. . . and whiskers on kittens.  These are a few of my favorite things.  And another of my favorite things is Liquid Glass!

Today I used the Liquid Glass to make Dew Drops on my paper roses.  For the tutorial on how to make the paper roses see my previous post titled Paper Roses.  You can use the LG on silk and dried flowers as well to make them look like they have dew on them.


Some other ideas:
  • Use Liquid Glass to outline your image.  This provides the look of embossing without needing to use the heat gun.  This looks especially great when used as "frosting" of a cake.
  • It gives the look of glass and makes "lights" shine.  Use it on Christmas Light stamps or the Paper Lanterns.  Use LG to create a faux glass "Bug Jar" and use one of the but sets to stamp some bugs to go into the jar.
  • Experiment with different applicators to add textured patterns.  Use a paintbrush and swirl the bristles to create small circles, half moons, or squiggles to achieve different results.  Use a stencil brush to dab on LG for a rougher texture.  Use a sponge to create a Spackle look. 

Wednesday, June 22, 2011

Adding Sparkle

For those of you just joining us this week I am demonstrating all the wonderful things you can do with Close To My Heart's Liquid Glass.  Check out the way you can make something in patterned paper really stand out in yesterday's post titled Liquid Glass.

Today I used LG to make the Lemonade look a little more realistic and then added some glitter with the LG to the lemon on my card.


Some other ideas:
  • It is fun to trace words with LG 
  • Works great on My Stickease and looks amazing! 
  • Place a small amount on a sheet protector.  When it is dry it peels right up and you can add it to your projects with a small about of LG around the edges to adhere it.  Draw shapes, trace stamped images, etc.  Then when the LG is dry peel it off and apply to artwork!

Tuesday, June 21, 2011

Liquid Glass

This stuff is officially amazing!  I am so excited about the twenty plus things you can do with this little bottle.  So this week I'm posting projects I've done using CTMH Liquid Glass.  I'm going to have a class (FREE) on Monday, July 18 using this product.  Contact me if you are interested in attending.

Today I'm going to show you what you can do with Liquid Glass on patterned paper.  Pick an element of the patterned paper that you want to stand out.  Apply the LG with a paintbrush for a thinner layer or directly from the tiny tip of the bottle for a thicker layer.  On this card I used it directly from the bottle on the leaves of the paper.


Some other ideas:
  • Use it for a "fray check" on the ends of  your ribbon after you have cut them the desired length
  • Create "Shimmering Pearls" by adding a small amount of Embossing Powder to some LG.  Then apply over your stamped art with a brush. 
  • For small areas try using a toothpick to apply to your artwork.  

Monday, June 20, 2011

Please Pray

I've started praying at bedtime for and with each of my children.  We have always prayed as part of our bedtime routine but I like Stormie Omartian's approach of praying specifically for each child by name.  Since I started doing this my middle boy won't let me forget - this really means a lot to them.
Photo Credit
 There is something about knowing someone is praying for me that speaks volumes.  I remember certain times when I have called my mom to share a burden with her and right there on the phone she will pray with and for me.  Sure lots of people say they will pray for me but when someone stops and takes the time to pray for me I am so encouraged. 
This week my little ones will be with their grandparents as their daddy and I go on a missions trip to Chattanooga with our youth group.  I'd appreciate your prayers.  This will be a tough one for me.  My children will be fine - it is more their mommy that I'm concerned about. 

Thank you and feel free to contact me with any of your own prayer concerns.  Have a great week!  May you be inspired, encouraged and blessed this week - so much so that you return the inspiration, encouragement and blessings to those around you! 

Sunday, June 19, 2011

Happy Father's Day


To my husband who is the best Father our children could have and my Dad who was the best Dad I could ever have.  To all the fathers out there.  Love your children well - lead them because they are following you whether you are aware of it or not!  And thank you for being the men they need, for being the man I need! 


Saturday, June 18, 2011

Weekends are for Rest

Enjoy the weekend friends!  May this weekend find you resting in Jesus surrounded by those you love.

Friday, June 17, 2011

Game Night

Sketchy Thursday's Challenge sketch

Here is my take on Sketchy Thursdays challenge.


Father's Day

What I made using the June stamp of the month.  This stamp is a great "starter set" with 24 stamps.  Each stamp is for a different holiday, season or celebration.  
My boys helped make this card for their "HERO" using this stamp set. 


I'm excited to use this set to make a "tree" with the give thanks stamp for my November page.  I'm super psyched to stamp a birthday card with the cake and use liquid glass to make icing!  Check back to see photos of those projects!  To find out how to get this set for a discounted price or for FREE click here or contact me.  

Wednesday, June 15, 2011

Wood Grain Technique

This was so much fun and I LOVE the results of this technique.  I would never have even heard of this technique if it wasn't for the Just Us Girls Challenge.  Check out the video tutorial here.
   Because I made a father's day card and used the wood grain technique to make my own background paper I think this card also qualifies for the Heart 2 Heart Challenge this week as well.
Materials used:
For the Wood Grain Background Paper
White Daisy Ink (this is paint based ink which I love!!)
 For the Tag
And my new favorite product (used to make the "brad" and write over DAD)

And using the same Wood Grain technique to make a card for this week's Colour Q challenge 


"This is the day the Lord has made, let us rejoice and be glad in it!"  Psalm 118:24 

Tuesday, June 14, 2011

Having Fun


Here are some more things I have done with the stamp set from the You & Me Kit ($34.95 retail now on sale for $15).

 (There is something underneath the layout in the photo above, sorry about that)
I really like using the stamp as the rays of the sun!  I love this set, can you tell?  To purchase your own for a great deal click here and while you are there check out all the great product at up to 80% off!

Monday, June 13, 2011

WIN!! with your FREE Studio J JPG

Something else you can do with your free Studio J JPG this month is enter the contest that Close To My Heart is having on facebook!
Grand Prize
  • Credit for 10 two-page, custom-printed scrapbook layouts.
  • 10 Memory Protectors® to slip their layouts into.
  • Free shipping and handling, so their custom-designed layouts will come straight to their door, ready for their cherished album!
2nd Prize
  • Credit for 5 two-page, custom-printed scrapbook layouts
  • 5 Memory Protectors
  • Free shipping and handling
3rd Prize
  • Quick Pic™ Album. 
Choose one of our three color options (Dark Chocolate, Dark Cranberry, and Outdoor Denim). These quick-to-assemble albums have open spines and a 4″ × 4″ display window in the front cover.
How Do You Enter?
2.  When finished with your layout go to shopping cart (you must approve your layout first!) and select JPG only for your FREE JPG.
3.  You will receive 3 JPGs (one of the right page of your layout, one of the left page and one with both pages - which will say "for web"), follow the directions in the e-mail to download your JPGs 
4.  Go to the contest page on facebook and select "view entries" and "submit your own entry"
5.  Share with all your friends on facebook and ask them to vote for your entry from July 1-10. 
The most votes wins the grand prize, second most the second place prize and 
third most the third place prize!
6.  Have fun and contact me if you have any questions. 

Saturday, June 11, 2011

Weekends are for worship

Worship - "to pay honor to God"
There are so many ways to worship God, in all that we do throughout the day.  I worship on my knees scrubbing spills off the kitchen floor, sitting on my floor reading stories of God's goodness to my children, at the table using paper to create works of art to send to friends and those we pray for,

in the fields catching fireflies and in my church pew singing some of my favorite songs.  Where ever this weekend finds you may you worship God with all you are, in all you do and with others - for corporate worship is like none other!


Closing with one of my favorites songs!!

Friday, June 10, 2011

Stronger Together

Like many of you, I was struck by the destruction of the tornadoes that ripped through the Midwest and southern states the past couple of months.  As I viewed pictures and youtube videos I was overwhelmed by the devastation!  Whole towns were torn apart and neighborhoods completely gone.  As I sat at my computer with my young children explaining what a tornado was - I remember crying and praying.  Together my boys and I prayed for the families that were directly effected by these storms.  We prayed to the God of all comfort and the Father of compassion.   We, like many of you, asked what can we do to help?

Last week I got an e-mail from Close To My Heart (CTMH) informing me that they were putting together a campaign to raise money for the severe flooding, tornadoes and storms that have affected the lives of thousands across the United States. 


I was so in love with the You & Me stamp and paper kit that CTMH offered last month.  It was an exclusive offer only for the month of May to celebrate National Scrapbooking Month.  I have used it on so many different scrapbook layouts and cards!  Now CTMH is extending this kit and offering it for $15 (more than a 50% discount!).  A portion of the proceeds will be donated to the American Red Cross Spring 2011 Floods and Tornadoes relief operations.
You & Me Scrapbooking Kit Includes:
1 – My Acrylix® You & Me Stamp Set (D-size)
1 – 12" × 12" Colonial White Cardstock
6 – 12" × 12" B&T Duos® Papers (New! Cardstock-weight)
1 – 6" × 9" You & Me Irresistibles™ Chipboard Die-Cut Sheet
1 Yard – Chocolate Stripe Ribbon
1 Package – Opaques Mocha Adhesive Gems
1 – Instruction Guide

This is an amazing deal and you are getting so much for your money!  A D-size stamp set alone retails for $22.95 not to mention all the paper and embellishments you are getting.  For more information or to purchase this kit contact me or shop here
To donate directly to the American Red Cross for this disaster relief or others they are helping with click here.  Together we can make a difference!

Thursday, June 9, 2011

Sale Sale Sale

Who doesn't love a sale?  Here is a preview of what is on sale (up to 80% off) at my Close To My Heart Website.


(Set of 15 Brads for $3.95)
(11 pieces of Chip Board Accents for $2.00)

(Set of 14 images for $3.25)

 (16 12x12 papers and 8 yards of ribbon only $3.00)
So many more selections while supplies last.  To take advantage of these awesome prices click here.  Happy Shopping! 

Paper Roses

So I found these paper roses on Lisa Stenz's blog and was directed to the tutorial on Kristine Fowler's blog.  I loved them and needed to find something to use them on.  Then I was introduced to Just Us Girls (JUG)'s challenge this week and I thought they would fit perfectly.  Just as I was deciding on that I got a facebook update on Sketchy Thursday's challenge.  So I used the flowers on both and came up with these.

To make the roses:

  1. Cut three squares the same size (4x4, 3x3, etc.)  I used 3x3 and 2x2 squares

2.  Fold each square in half to make a triangle, fold again and fold again to get this small triangle.


3.  Cut each triangle into a petal shape and cut off the tip of the triangle.  When you unfold them they will look like the picture below.


4.  The first "flower" cut off two petals, the second flower cut off three petals and the fourth flower cut in half (so you have two four petal flower pieces).  Then off of one of the four petal pieces cut off one single petal.

5.  Take the one with six petals and glue the end petals together to form a cone, do the same with all the flowers except the one and two petal flowers.

6.  Using a toothpick curl the ends of the petals under.  Then glue each cone into the larger cone making your rose!

The video tutorial is here:

And this is the end result
Related Posts Plugin for WordPress, Blogger...